Contact Us

Use the form on the right to contact us.

You can edit the text in this area, and change where the contact form on the right submits to, by entering edit mode using the modes on the bottom right. 


123 Street Avenue, City Town, 99999

(123) 555-6789

email@address.com


You can set your address, phone number, email and site description in the settings tab.
Link to read me page with more information.

HOME

Filtering by Category: Recipes

GRILL TIME: BEER CAN CHICKEN

Jennifer Mejia

public.jpeg

I really can’t take all of the credit for this recipe. My brother-in-law is the grill master, and he’s been making beer can chicken for years. The base for this recipe is his, but because I can’t remember exactly what he does, I think I’ve changed it a bit. If you’ve been following my blog from the start, you may recognize the rub. You can also make a version of this in the oven, and I do. It’s called Roast Chicken for Harry and is a favorite of a few friends of mine. Now that summertime is here, it’s grill time, so we can take Roast Chicken for Harry up a notch and impress your guests with your grilling skills.

The good news is that it’s still a ridiculously simple main course to prepare. The ingredients pictured above are all you’ll need besides a chicken and a can of beer. You will need one special piece of equipment that may not be found in every household.. A vertical roasting pan or ceramic chicken steamer is required because something needs to hold the beer can, and then the chicken sits vertically on top of it. I have this one from Williams-Sonoma, and it works like a charm. It provides the flexibility to roast one or two chickens at a time, and it’s lightweight, which is great because two chickens and two beer cans are heavy. My brother-in-law has a Big Green Egg Grill and uses this ceramic steamer to hold the beer can and chicken. The toughest part of preparing this bird is trying to keep your grill at 425 degrees consistently, but I managed to work it out fairly quickly on our Weber gas grill.

Since the rub is good for 2 months if stored in the refrigerator, you can prepare it in advance. The quantity in this recipe is enough for two or three chickens, so you can enjoy this again with very little effort if you decide to make only one. My brother-in-law likes to use a dark Mexican beer, but they can be difficult to find in a can, so I use regular Modelo. My sister thinks Budweiser is fine. ;-)

 
public.jpeg
 

                      1                        3.5- to 4-pound roasting chicken*
               ¼ cup                        smoked paprika                                
              ¼  cup                        brown sugar, moderately packed
               ¼ cup                        kosher salt
    1 tablespoon                       fresh rosemary, minced
    1 tablespoon                        fresh thyme, minced
      ¼ teaspoon                       freshly ground black or white pepper

   12-ounce can                       beer, preferably dark
                        

Preheat the grill to 425 degrees. To make the rub, add the paprika, brown sugar, salt, minced rosemary, minced thyme, and pepper into a bowl and combine well using your hands.

Remove any giblets inside of the chicken. Pat the outside of the chicken dry with paper towels. Using your hands, pat the rub onto the skin of the entire chicken, including legs and wings. (Remember, this rub is enough for a few chickens, so you won't need to use all of it.) Pour out about 1/3 of the beer in the can (you can pour it into a glass and drink it versus wasting it). Add 2-3 tablespoons of the rub to the remaining beer in the can. Place the beer can into the canister holder of the roaster or steamer. Carefully hold open the cavity of the chicken and place it over/on top of the beer can. Tuck the wings behind the body of the chicken, sort of like the chicken is kicking back and relaxing. Place the chicken on the grill and roast. *For roasting time, I use Julia Child’s formula of 45 minutes plus 7 minutes for each pound. So a larger or smaller chicken may be used, and roasting time should be calculated using this formula. Half way through, rotate the chicken 180 degrees. The skin will look charred, but it is so crispy and tasty that way.

Once the chicken is finished roasting, tent it with aluminum foil and allow it to rest for at least 10 minutes prior to carving. Then lift the chicken off of the beer can/roaster. Pour the beer mixture into a bowl or creamer for serving. Carve the chicken as you typically do. I like to keep the crispy skin aside as a treat. Spoon beer mixture over meat as desired.

public.jpeg

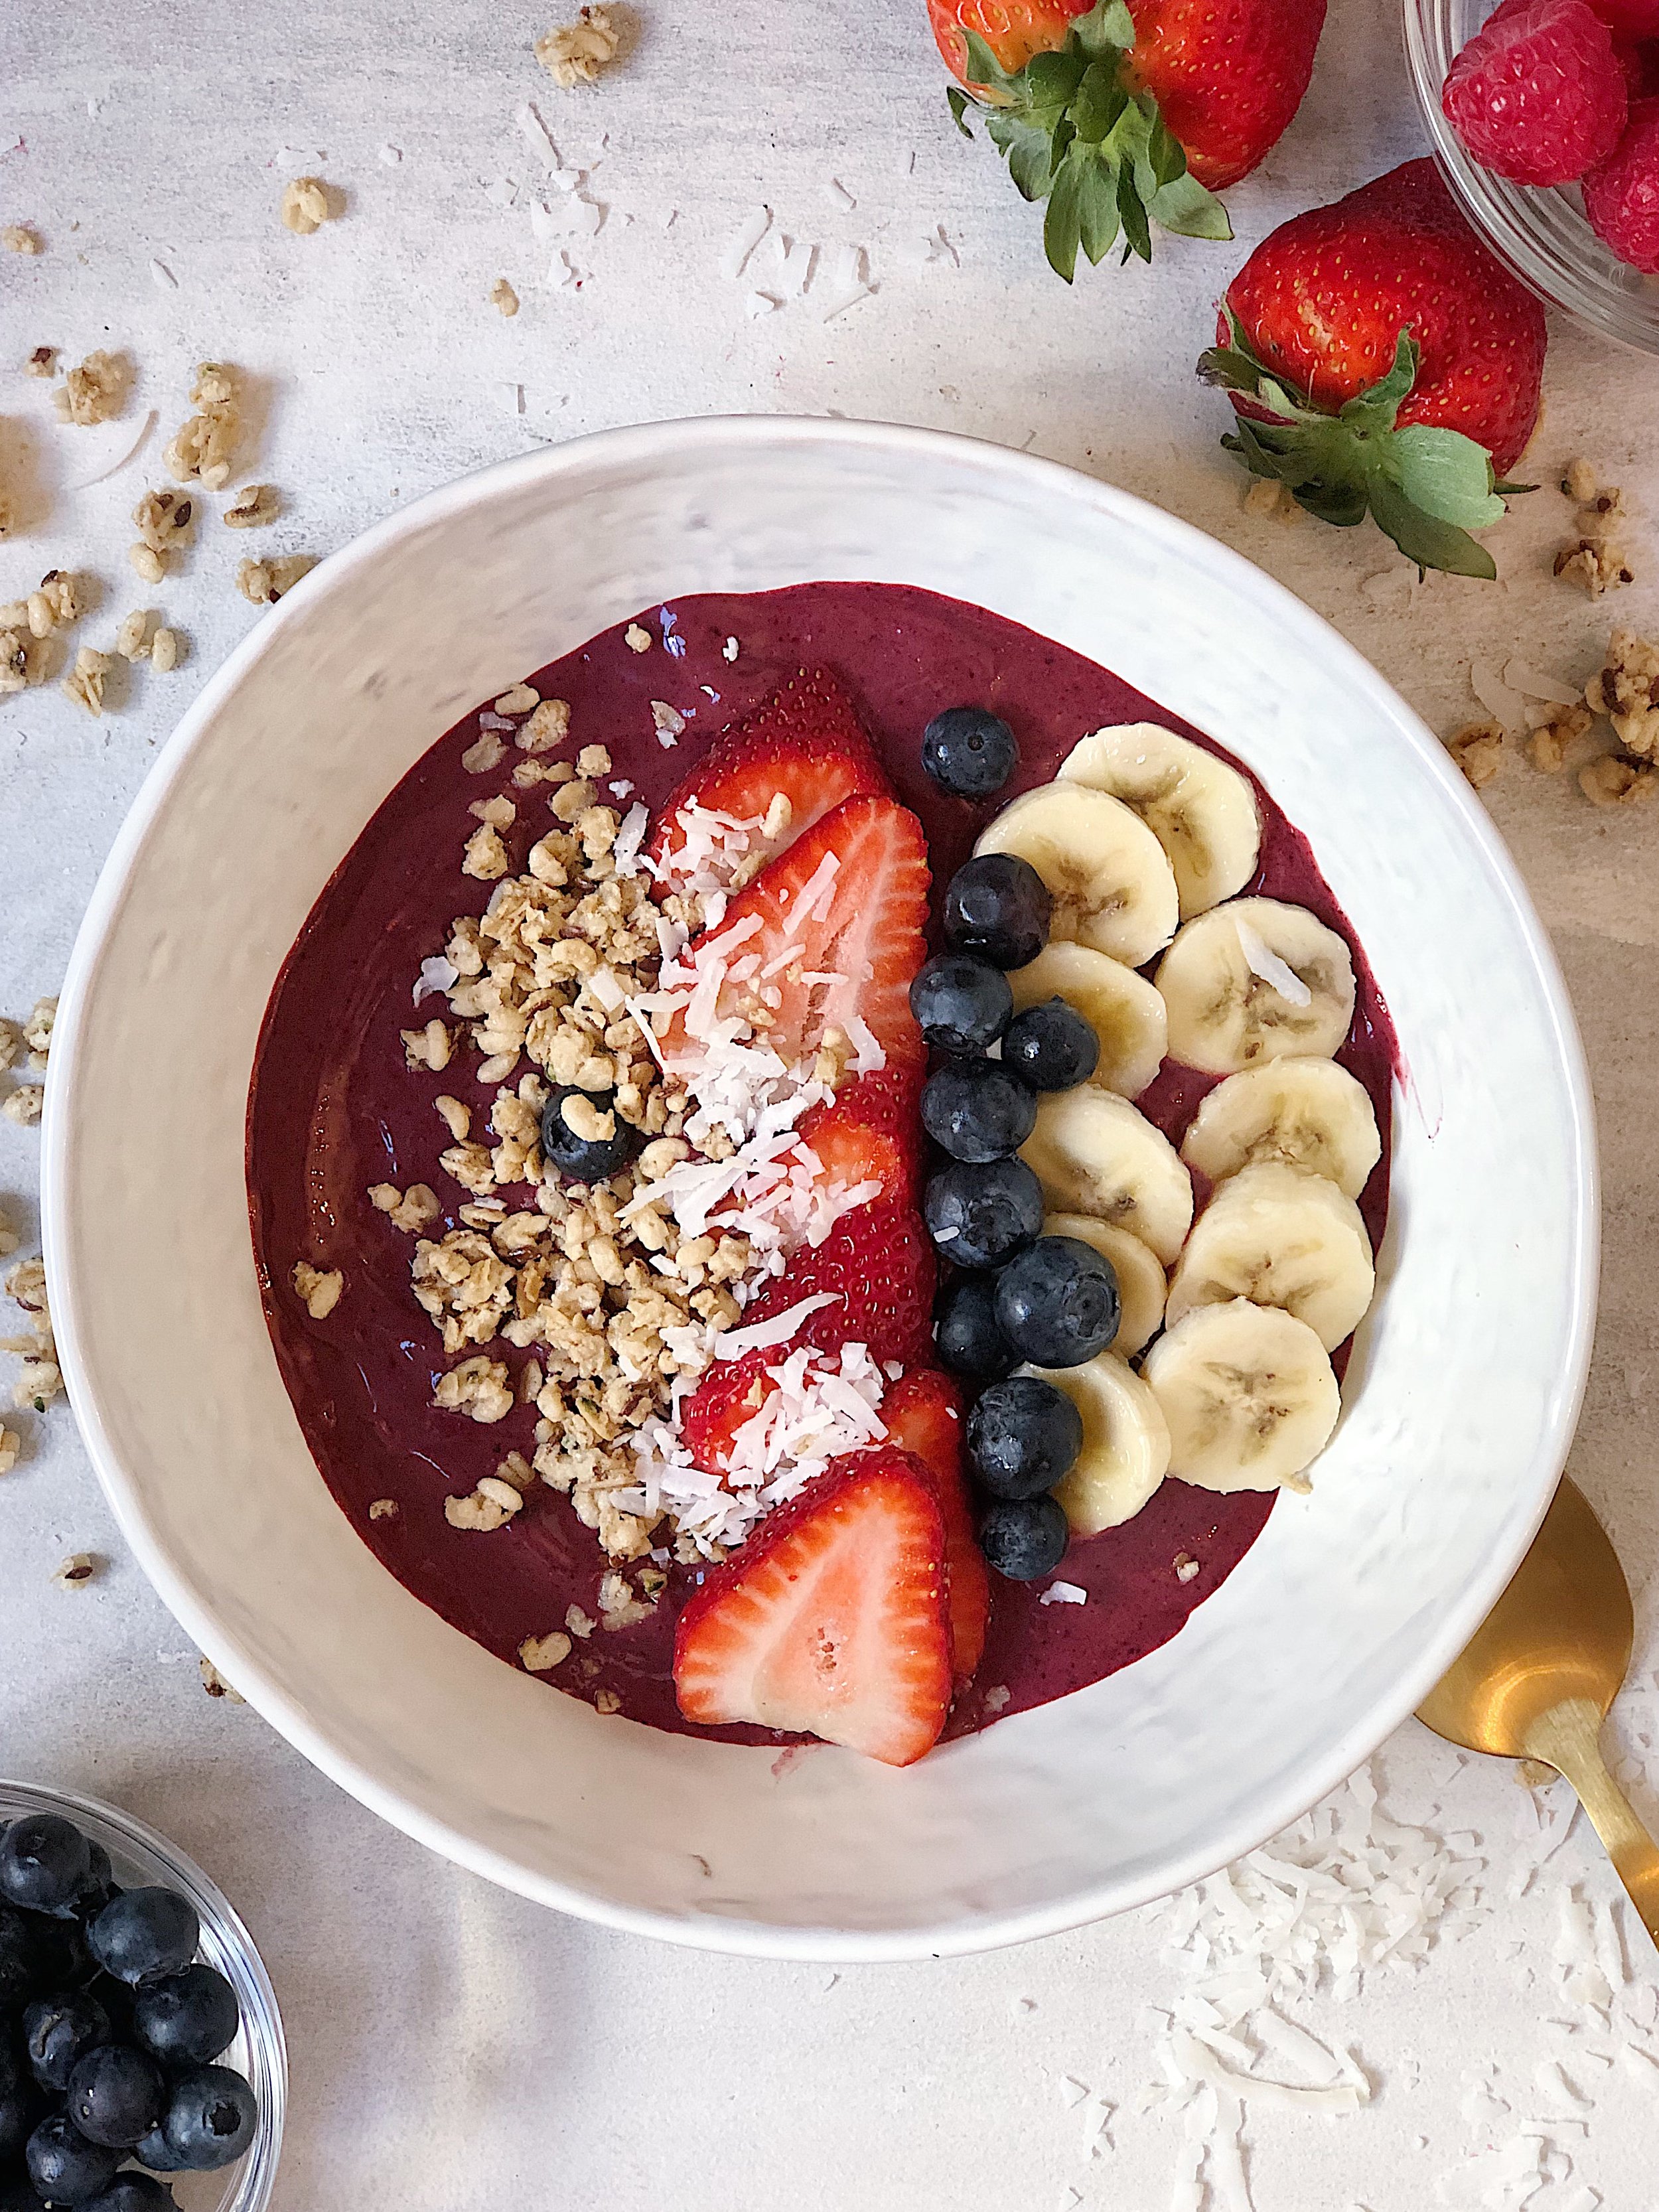
MIXED BERRY SMOOTHIE BOWL

Jennifer Mejia

 
IMG_6426.JPG
 

Having lots of antioxidants in my diet is important because I believe in their benefits, mainly the protection of our cells from damage caused by free radicals. Free radicals are thought to cause inflammation, and inflammation is thought to be a root cause of many diseases such as cancer. Açai berries have become extremely popular because they’re high in antioxidants and they taste great! I became addicted to açaí bowls from Juice Generation. That addiction was short-lived once I reviewed my Amex bill after a month of daily consumption, so I started purchasing frozen açaí and making them at home…

Until one day I was out and still had that craving. Fortunately, I had bags of frozen mixed berries—blueberries, raspberries, and strawberries. Unlike açai, they’re available almost anywhere AND they’re also high in antioxidants, especially blueberries. So I decided to start making mixed berry smoothie bowls for breakfast, even when I have a supply of frozen açaí. Mixed berry smoothie bowls are simple, quick, and extremely tasty—so delicious that you’ll forget you’re eating something healthy.

You can use regular milk, but I’ve been trying to minimize my dairy intake. I recently discovered NuMilk “Make Your Own” Fresh Almond Milk available at Whole Foods. It has a clean almond taste, is dairy-free, and is free of the ingredients I can’t pronounce that are required to keep shelf-stable almond milk shelf-stable. Nature’s Path makes a wonderful hemp granola that my younger son and I love as a topping. And the best part of a smoothie bowl is that you can top it with anything you desire. Just try to keep it healthy. My younger son asks me to make smoothie bowls for him at all times of day. Have one for breakfast, or take a clue from him and consume it as a healthy snack or lunch.

1 SERVING

                      1 ½ cups                  frozen mixed berries
½                  banana, preferably ripe
  1 heaping tbsp                  almond or cashew butter
  1 tbsp                  honey or agave nectar
2 tbsp                  almond or coconut milk

   ¼ cup                  hemp plus granola
  1-2 tbsp                  unsweetened fresh coconut
 as desired                  sliced fresh banana
as desired                  fresh blueberries
as desired                  sliced fresh strawberries

Use organic ingredients where possible. Combine frozen berries, ½ banana, nut butter, sweetener, and milk in a high-speed blender and blend/purée until smooth but NOT liquid. This may require stopping and stirring a few times and/or shaking the blender to break up chunks of frozen fruit. Scoop into a bowl and top with granola, coconut, fresh fruit, and any other healthy topping desired.

"IRONWOMAN" SMOKY BBQ VEGGIE BURGERS

Jennifer Mejia

 
FullSizeRender.jpg
 

Lately I have been trying to focus on being healthier from within. I’ve started working out again—a serious workout at Orange Theory Fitness—and I’m trying to go two or three times per week. For any of you who have tried OTF, you’ll know they monitor your heart rate. And my heart rate monitor has proven that I am really out of shape. That must change, especially since I am now halfway through the decade toward 50. And my boys are only 4 and 7 years old. This mama needs to stay healthy and fit for many more years so I can chase them, literally and figuratively.

But along with exercise comes eating better. Many years ago, one of my sister’s best friends beat Stage2/3 breast cancer. Yes, she had surgery and underwent chemotherapy and radiation. In addition, she made a strong, conscious effort to think positively—she would imagine her tumor shrinking every night as she held her son who was less than one year old at the time. But she also dramatically changed her diet after a lot of research about what many believe causes tumor growth. She concluded there were two huge culprits—refined sugar and animal protein—so she eliminated both from her diet and has never looked back. I am happy to say that over a decade and a half later, my sister’s dear friend is as healthy as can be. While it wasn’t until the past year or so that I’ve begun to make huge changes, my concerns about refined sugar and animal protein have been in the back of my mind all of these years.

Animal protein provides a lot of nutrients. Red meat, specifically, is a great source of iron. But I’m not a huge fan of red meat on a regular basis for a variety of reasons. Recently, my youngest son was found to be iron deficient. So we went to see a nutritionist to help optimize his diet in an attempt to increase his iron levels without supplements…because iron supplements for kids taste awful and are extremely difficult to mask. Luckily, there are many great sources of iron besides red meat, although plant-based sources of iron are not absorbed as well and as easily as meat sources. To assist with the absorption of iron, you can do a few things. First, Vitamin C aids in the absorption of iron, so eating strawberries, raspberries, citrus, and red peppers in the same meal with iron-rich foods will help. On the other hand, calcium inhibits the absorption of iron, so steer clear of foods like cheese and milks that are rich in calcium (even many non-dairy milks are now fortified with calcium) when consuming iron-rich foods. It’s best to consume your calcium and iron at least two hours apart.

Luckily for you (and me), these veggie burgers are loaded with iron, as quinoa, chickpeas, and pepitas, aka pumpkin seeds, are all rich in iron. The original recipe is from The Minimalist Baker Everyday Cooking cookbook, and I’ve adapted it to add pumpkin seeds, use a store-bought BBQ sauce, and optimize the ingredients to take the guesswork out. In my opinion, the most important factor in making this recipe delicious is to use a really smoky BBQ sauce. The pumpkin seeds add a little more crunch and a little extra saltiness, but if you don’t like the added crunch, you could always grind the pumpkin seeds in a food processor or Nutribullet before including. My four-year-old LOVES these burgers and would eat them every day of the week if I served them. They’re that good! And they’re super simple. Did I mention they’re healthy and a great source of plant-based protein and iron? You’re welcome!

SERVES 4

          1        15-oz can garbanzo beans (chickpeas), rinsed & drained
¾ cup        cooked quinoa
½ cup       plain bread crumbs
1 tsp       garlic powder
  1 ¼  tsp       ground cumin
1 ¼ tsp        smoked paprika
1 tsp        chili powder, plus extra to sprinkle           
  1 ½ tsp        kosher salt, plus extra to sprinkle
 1 heaping tbsp         coconut sugar (or brown sugar)
¼ cup         smoky BBQ sauce*, plus more for serving
¼ cup        roasted pepitas (pumpkin seeds)

  about 3-4 tbsp        grapeseed oil (for frying)
  4        good buns, such as brioche or potato rolls
as desired        fresh cilantro  
 as desired        red onion, sliced

Cook the quinoa according to package directions. But it’s usually a 2-to-1 ratio of water to quinoa. I measure about 1/3 cup uncooked quinoa, which yields a little extra than required when cooked.

 
IMAGE.JPG
 

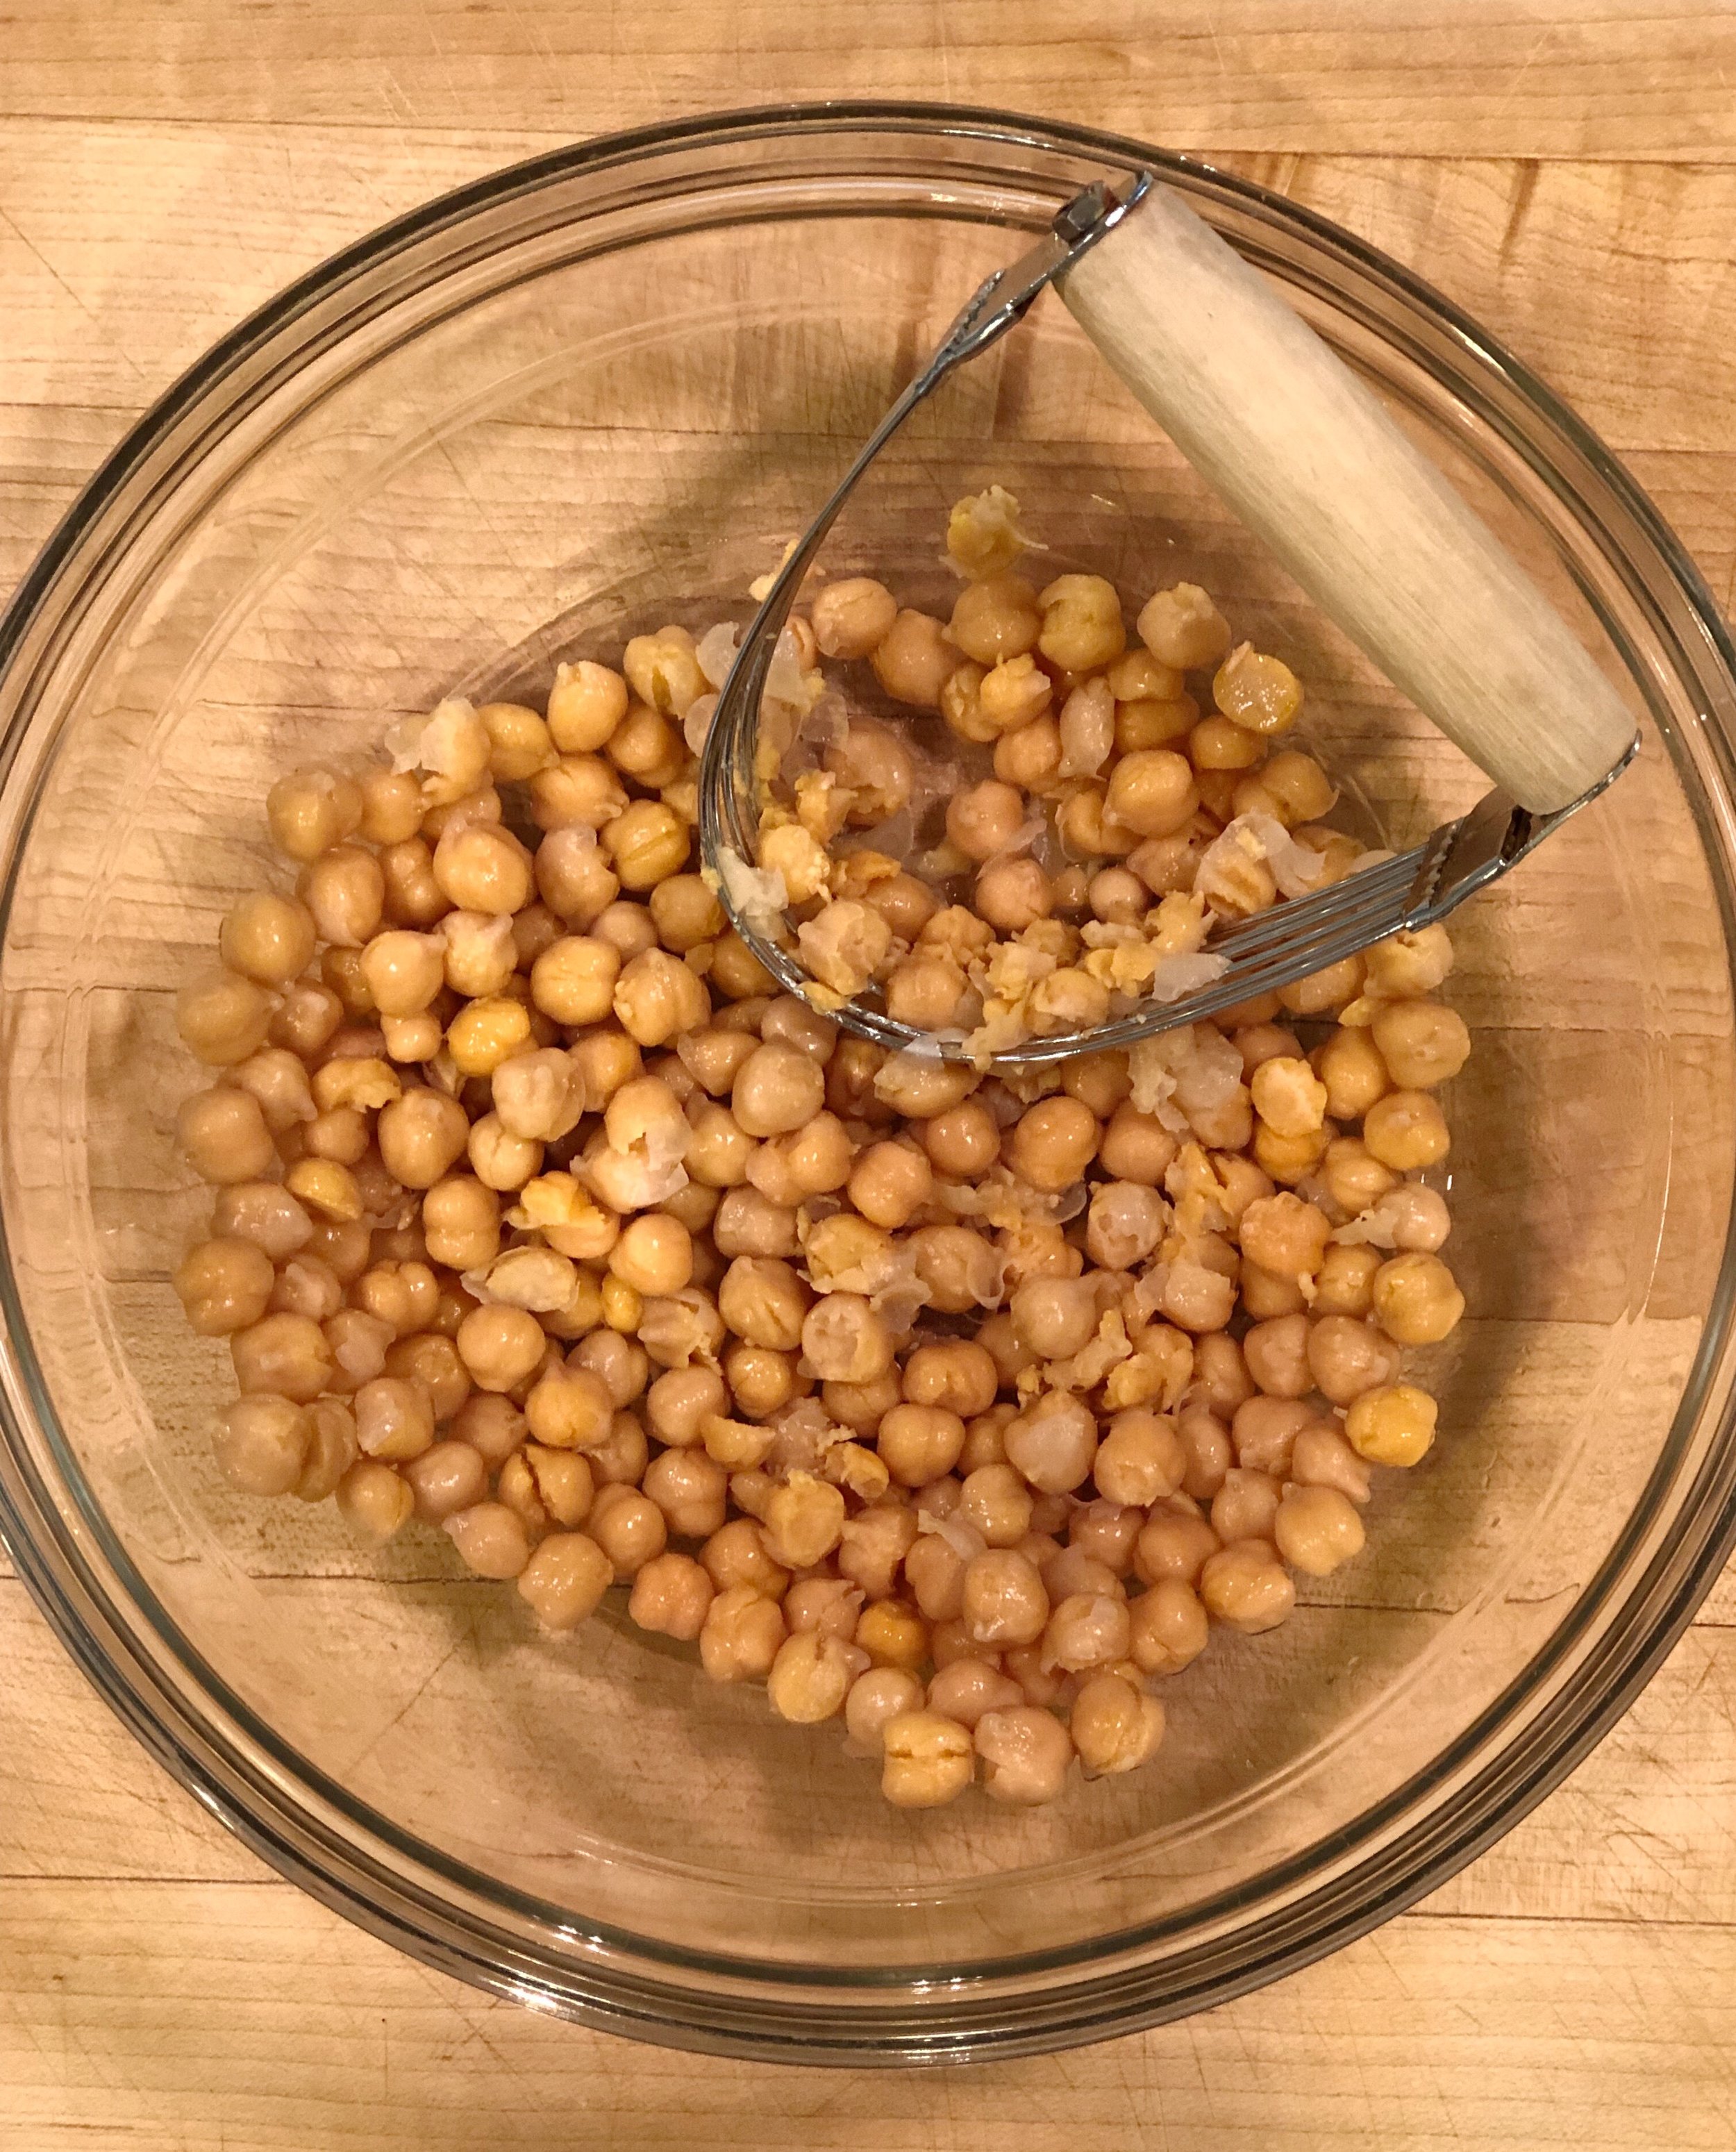
Add garbanzo beans to a medium bowl, and using a pastry knife (or fork), mash, leaving a few whole. Add the entire first group of ingredients. Stir and mash together with a wooden spoon and then your hands to combine. Form a huge ball with the dough, divide evenly into 4 pieces, and shape into burger patties. Don’t make them too thick, as you want them to fill the bun. Place on a plate and sprinkle with salt and a little chili powder, if desired. 

 
IMG_6761.JPG
mashed chickpeas.jpg
IMG_6763.JPG
IMG_6764.JPG
 

Heat a large skillet over medium heat. Once hot, add enough grapeseed oil to generously coat the bottom of the pan. Place burgers seasoned side down and cook for 3 minutes. Sprinkle the top side with more salt. Flip and cook another 3 minutes. Place on a paper towel to cool. Place on a bun with cilantro, red onion, more BBQ sauce, and anything else you may want to add. 

 
IMG_6765.JPG
veggie burgers white.jpg
 

These can be made ahead of time up to the cooking step and stored for 2-3 days in the refrigerator. Before cooking, allow to sit out at room temperature for 20-30 minutes.

*I use Trader Joe’s Kansas City Style BBQ Sauce (you can pronounce all of the ingredients). 

CASHEW? I DON'T EVEN KNOW YOU!

Jennifer Mejia

 
FullSizeRender.jpg
 

I just couldn’t resist that title. I may live to regret it since someone reading it without a photo or any context won’t have the first clue what this post is about. When I was a kid, my mom used to say, “Tissue? I don’t even know you!” when we asked for a tissue. That mom of mine is a funny gal! No wonder I love her so much. (Did I mention she would also pump the gas pedal to the beat of the music while driving down our back road if a song came on that she liked?)

Let me get to the point because this post shouldn’t take up too much of your time. When I was a kid, I got a recipe for peanut butter, honey, raisin, and oat snack bites from my Sunday School class. Don’t ask me how or why it was part of the lesson or materials, but they were a favorite snack of mine. I used to make them myself at 8 years old. I attempted to look for that recipe about 10 years ago at my mom’s house without any luck. Fast forward, a nutritionist I worked with gave me a recipe that I thought was very similar. But with all of the peanut allergies (including Kai’s), I decided to try these with cashew butter and make a few little tweaks. I need a healthier way to satisfy my cravings as I try harder to cut refined sugar. These little bites are packed with protein, fiber, and Omega-3 fatty acids. They are a perfect healthier treat when your sweet tooth is calling!

Before I get to the recipe, allow me to provide a few health benefits for consuming these treats, other than just satisfying your sweet tooth. First, there’s protein. I’m often tired…exhausted, truth be told. I need energy, and I usually do the wrong thing and pick up something loaded with sugar and other carbohydrates. Naughty girl! Since protein takes longer than carbohydrates to break down in the body, this treat will provide a longer-lasting energy source. Next we have fiber, which is great for controlling blood sugar, helping with digestion and regularity, and helping to lower cholesterol. That’s just to name a few. And the benefits of Omega-3 Fatty Acids (plant-based in this recipe) are almost too many to list. But a few that are important to me are helping to reduce the risk factors for heart disease, fighting depression and anxiety, improving eye health (as I can’t see a thing any longer without my readers), and fighting inflammation, which is believed to be a root cause of so many diseases. For those of you who are pregnant or have kids, Omega-3s can promote brain health for your unborn child during pregnancy and for infants once born, and it can also reduce the symptoms of ADHD in children.

And best of all, this baby couldn’t be simpler to make. If you want, you can increase the amount of ground flax seed and chia seeds, but I always like to provide a lower amount, and then you can increase as desired. For flax seed, I like to purchased whole flax seed and then grind it in my Nutribullet. I just think it’s fresher and perhaps a little more beneficial that way, but that’s probably just my crazy brain and not based on anything I’ve read. If you use a food processor, it’s much easier, but just be aware that your bites won’t look exactly like the photo above. If you don’t have a food processor, you’ll be just fine, as those pictured above were mixed by hand and I survived the stirring. I promise you’re going to love these, and in my opinion, they taste so much better than using good ole peanut butter.

MAKES 20-24 BITES

1 cup       cashew butter
¼ cup                honey (organic preferred)
1 cup                  organic quick oats
2 tbsp                ground flax seed
1 tbsp                 chia seeds
¾ cup                raisins
¼ cup                 unsweetened coconut flakes
¼ tsp                  kosher salt
 

Combine oats, flax seed, chia seeds, coconut flakes, and salt in a food processor and pulse until combined OR combine those ingredients in a bowl and use a spatula to combine. Add cashew butter, honey, and raisins, and pulse to combine. Will need to stop, stir, and pulse again. Roll into balls about 1-inch in diameter and refrigerate for one hour before eating. Store in refrigerator in an air-tight container. 

 
FullSizeRender.jpg
FullSizeRender.jpg
 

MAKE IT AHEAD: COQ AU VIN

Jennifer Mejia

 
IMG_3442.JPG
 

Nothing says come in from the cold more than this one pot meal. It’s comfort food. It’s delicious. But I feel like the name itself…maybe the fact that it’s French…sounds intimidating to many. Over the years, I’ve tried lots of recipes for this fabulous dish, including one from Ina (of course). The good news is that’s helped me create my own version. One that’s really easy. It’s prepared completely on the stovetop in about 30-40 minutes of active prep and cooking time. (The braising takes longer but you can relax during that time.) And the best news of all? It’s actually better if served the next day. So it’s a great dish to make ahead if you’re expecting guests and would rather spend time with them than in the kitchen once they arrive.

I like to use boneless, skinless chicken thighs. Free range/organic. I think chicken thighs are best for braising—they get nice and tender and you can actually cut them with a fork once braising is complete. But you can also use a whole chicken cut into pieces or any one cut if you have a favorite. Remove as much of the fat as you can before browning so it’s not a super fatty/greasy dish.

A few tips. When you make coq au vin, which translates to “chicken with wine,” contrary to what you might think, you don’t need to use expensive wine. (But you can drink it once it’s served!) A $10-12 bottle of dry red wine will do the trick. As for prep, I typically like to prep all of my ingredients ahead of time. Things like cutting vegetables and herbs. But in this case, since the first step is to brown the chicken and that takes time, you can cut all of your vegetables and measure your liquids while that’s happening to be more efficient.

If you choose to make this ahead, you won’t be disappointed, as it actually tastes even better the second day. (But don’t worry if you want to eat it right away…it’s still delicious!) And the best news is that when you remove it from the refrigerator the next day, you’ll see that a thick solid layer has formed on the top. That’s fat. Pick it off with a spoon or fork and discard it before reheating. You’ve just made your dish a bit healthier.

SERVES 6-8

About 2 ½ pounds boneless, skinless chicken thighs (preferably organic)
                            to taste               kosher salt
to taste               black pepper (preferably freshly ground)
2 tablespoons                 unsalted butter
2 teaspoons                freshly minced garlic
1 large               Vidalia onion, cut into 8 wedges
1/2 pound (about 4) carrots, sliced 1/2 inch thick, diagonally
about 10               cippolini onions
4 slices                thickly sliced bacon, diced
1 ½ cups                dry red wine
1 cup                chicken broth
2-3 tablespoons                  good brandy or Cognac
1 tablespoon                 tomato paste
10 sprigs                  fresh thyme (preferably tied with kitchen string)
½ pound                  crimini mushrooms, stems removed and quartered if large
1 tablespoon                   all-purpose flour or corn starch
2 tablespoons                   water

Remove excess fat from chicken. Pat dry with paper towels. Season both sides with salt and pepper. In a large Dutch oven over medium-high heat, melt one tablespoon of butter. Brown the chicken in batches in a single layer, about 3 minutes per side. Remove the chicken and set aside. 

 Add bacon, carrots, onions, and garlic, and cook for about 8 minutes, stirring occasionally. Add in red wine, broth, brandy, tomato paste, and thyme and stir to mix. Add chicken back in, including any juices on the plate. Bring to boil, cover, reduce heat and simmer for 30 minutes, stirring occasionally. 

 After 20 minutes, heat remaining 1 tablespoon butter in a non-stick skillet over medium heat. Sauté mushrooms for 5 minutes. Add mushrooms to the chicken pot and simmer uncovered for an additional 10 minutes. Remove chicken from the pan. In a separate bowl, blend flour or corn starch and water. Add to pan, increase heat to high, and stir constantly for 2 minutes to thicken sauce. Add chicken back to pan. Serve. 

 If making ahead, allow to cool, place in refrigerator overnight. The following day, remove the thick layer of solid fat. Then reheat covered over low heat, stirring occasionally, for about 20 minutes. 

 
FullSizeRender.jpg
 

MEXICAN CHICKEN SOUP

Jennifer Mejia

 
IMG_3148.JPG
 

A few weeks ago, a chef I follow on Instagram posed a question to her followers about minimizing food waste. I commented that I often like to prepare a meat dish that serves more than we can eat in one night, and then I use the leftovers to create something new the following day. I don’t know about you, but I don’t usually like to eat the same thing two days in a row. I need variety to keep things exciting. Doing it this way saves time so you’re not starting from step 1 every night.

If you’ve roasted a chicken and you’re wondering what to do with all of the leftovers, look no further for a solution. While this delicious and easy recipe is not my creation (I got the original from a friend who got it from a book), I have shamelessly stolen it and made it my own over the years.  It’s a really tasty and ridiculously simple soup that is perfect for a cold winter day. But the best part is that you won’t spend all day preparing it. Instead, you can relax by a warm fire and cozy up with a good book or watch an old movie. You can obviously prepare chicken for the soup if you don’t have leftovers, but I like to make my Roast Chicken with Lemon-Butter Sauce and then save the leftovers for this soup the next day. Enjoy life! Don’t spend it all cooking.

SERVES 4

About 1 pound       cooked chicken off the bone, roughly chopped
1 cup                  Vidalia (sweet) onion, medium diced
¾ teaspoon                  fresh minced garlic
  ¼ teaspoon                  ground cumin
  ¼ teaspoon                  chili powder
14.5 oz can                  diced tomatoes with herbs, undrained
4 oz can                  diced green chiles, undrained
32 oz                  low sodium chicken broth
1 ½ teaspoon                  kosher salt
1                  ripe avocado, sliced
1 bunch                  fresh cilantro, leaves only
1                  fresh lime, cut into wedges
1 cup                  grated Mexican cheese blend
  ½ cup                 sour cream
  4                 corn tortillas
  3 tablespoons                 extra virgin olive oil

Preheat oven to 375 degrees. Using a pastry brush, spread olive oil on one side of corn tortillas. Sprinkle with salt. Cut strips about ½ inch wide, place on cookie sheet, and bake for 8-10 minutes, depending on desired crispiness.  

In a large dutch oven or pot over medium-high heat, drizzle 1½ tablespoons olive oil. Add onions, garlic, cumin, and chili powder and sauté for 3 minutes, stirring occasionally. Add in chicken broth, diced tomatoes,  green chiles, and chicken. Increase heat to high and bring to a boil, then reduce heat and simmer for 15 minutes. Season with 1½ teaspoons salt or as desired. Place in serving bowls. Squeeze a fresh lime wedge over soup. Add toppings as desired—cilantro, avocado, cheese, tortillas, and sour cream.

 
IMG_3199.JPG
IMG_3198.JPG
IMG_3197.JPG
 

FUDGEY GOOEY CRINKLE COOKIES

Jennifer Mejia

 
IMG_0933.JPG
 

If I have one weakness in life, it’s chocolate. These ooey-gooey cookies are like crack (just an expression…I’ve never actually tried crack). And they’re beautiful to boot…almost like they’re topped with a freshly fallen snow. But that still doesn’t make me feel guilty about devouring them. The inspiration for this recipe actually came from a pastry chef in the Washington, DC area. My sister makes these cookies at Christmastime (she’s about the best cookie and pie baker I know), so I wanted to try them with a minor twist. They are like brownies but in a cookie form. The key is not to overbake them so they maintain their gooey-ness!

Most crinkle cookie recipes I’ve seen use cocoa and granulated sugar. I think the use of chocolate chips and brown sugar instead makes them perfectly moist and fudgey. Make sure you allow time for the dough to be refrigerated. I make the dough, which is super easy to prepare, the night before. Be careful, it’s tempting to forego the cookies and just eat the entire bowl of dough. Your friends and family will love them. And with a little help from my Christmas tree, a few holly berries, and jute twine, you can make beautifully festive gifting bags.

MAKES 72 COOKIES (Recipe can be halved.)

 2 cups                 semi-sweet chocolate morsels*
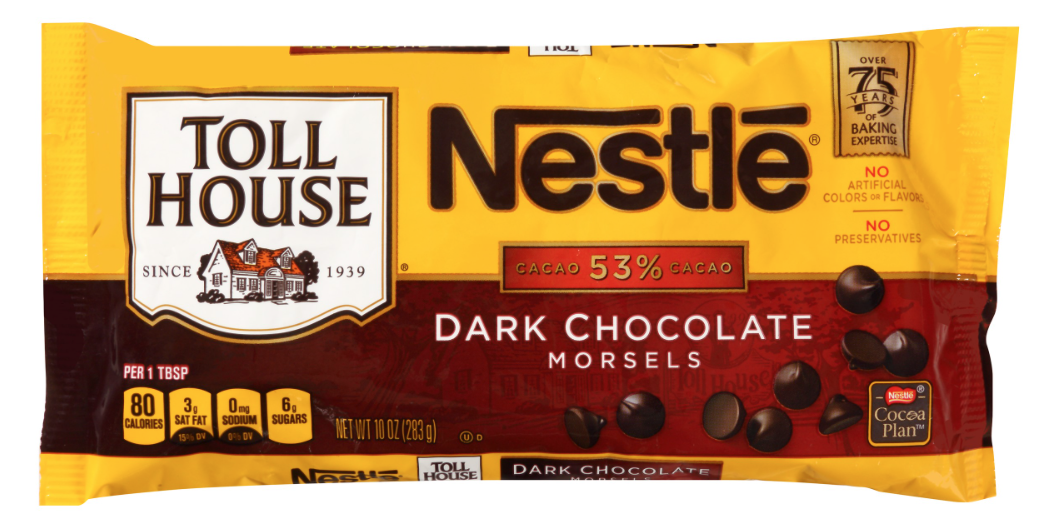
  1 cup                  dark chocolate morsels*
3 cups packed brown sugar
1 cup                  canola oil
  6                  large eggs, room temperature
1 ½ teaspoons                  pure vanilla extract
  3 cups                  all-purpose flour
1 tablespoon                  baking powder
  1 tablespoon                  kosher salt
½ cup                 confectioner’s sugar for rolling

Place two inches of water in a large saucepan over medium heat. Combine the morsels, brown sugar, and oil in a heatproof glass bowl wide enough to sit over the opening of the saucepan. (You can also use a double boiler, but I don’t think many people have them. I have an All-Clad that I love if you’re in the market.)


I use Nestlé Toll House Semi-Sweet and Dark Chocolate Morsels.

FullSizeRender.jpg
 

Melt the mixture, stirring occasionally.

 
FullSizeRender.jpg
FullSizeRender.jpg
 

Once melted and consistently smooth, remove the bowl from heat. Using a wire whisk, mix in the eggs and vanilla until completely combined.

 
FullSizeRender.jpg
 

In a separate bowl, use a wire whisk to combine the flour, baking powder, and salt. Then gradually add this dry mixture to the chocolate mixture, stirring by hand to combine.

 
FullSizeRender.jpg
IMAGE.JPG
 

Cover and refrigerate overnight. 

The following day, preheat the oven to 325 degrees. Line baking sheets with parchment paper. In a wide, shallow bowl, place confectioner’s sugar (sifted if necessary…you don’t want lumps). Remove the dough from the refrigerator and allow it to sit for about 15-20 minutes (the cookies bake better this way). Scoop the dough and form balls about 1 ¼ inches in diameter. Roll the balls in confectioner’s sugar to coat completely. Don’t shake off the excess. Place balls about 2 inches apart on the parchment paper.

 
FullSizeRender.jpg
 

Bake 12 minutes. The cookies will be soft and appear slightly cracked/crinkled. Do NOT overbake or they’ll be crispy and lose their gooey-ness. Remove from oven and allow to rest on the pan for 1 minute. Move to a wire rack to cool completely.

 
FullSizeRender.jpg
FullSizeRender.jpg
 

To make for a wonderfully festive gift presentation, stack several cookies in a food-safe clear plastic goodie bag. I use these from Party City. Then use jute string and festive plants like holly berries and/or pine branches (I clipped them from my own tree!) to tie the bags.

 
FullSizeRender.jpg
 

COCO-CHOCO BARK

Jennifer Mejia

 
coco-choco bark.jpg
 

I’ve always said, you can’t trust a person who doesn’t like chocolate. I’m only half serious. Maybe you just can’t trust them when it comes to dessert. (Insert wink emoji.)  But would those who say “no” to chocolate change their mind if that chocolate dessert was somewhat healthier for them? This version of chocolate bark was inspired by a recipe from a nutritionist who helped me make small changes to eat healthier and satisfy my sweet tooth at the same time.

This recipe is SO simple. It’s made with raw cacao and coconut oil. Raw cacao is high in antioxidants, which absorb free radicals that cause tissue damage and disease like cancer. The benefits of coconut oil come mainly from healthy fats called medium chain fatty acids (MFCAs). MFCAs are easier to digest, have anti-microbial and anti-fungal properties, and are processed by the liver so they are immediately converted to energy instead of being stored as fat. And there are many other believed health benefits of coconut oil like a reduction of inflammation and arthritis and prevention of heart disease and high blood pressure. You can google coconut oil benefits and find a world of information.

This treat is sweetened with 100% pure maple syrup, which is slightly better than sugar, in my opinion, since it has small amounts of minerals like iron, calcium, and potassium. You can make this coco-choco bark your own by adding whatever ingredients tickle your fancy. Or you can use my favorites listed below.

2/3 cup                   unfiltered coconut oil (liquid measure)
2/3 cup                   sifted raw cacao powder
1/3 cup                   100% pure maple syrup
big pinch                   sea or kosher salt
amount desired                   dried cranberries, blueberries (preferably juice-sweetened)
amount desired                   nuts or seeds such as almonds, walnuts, pepitas
amount desired                   unsweetened coconut flakes         


Line a 9x13 pan with parchment paper. Scatter desired toppings evenly across paper (this will also help hold the paper in place). 

Sift raw cacao powder into a bowl. In a small saucepan, heat the coconut oil over low heat for 3 minutes, stirring occasionally. Remove from heat and immediately add maple syrup. (You don’t want to heat maple syrup because it loses some of its sweetness when heated.) Stir vigorously with a wire whisk until well combined, about 1 minute. (If it’s not blended well, you’ll have parts of your bark that are not sweet.) Add the sifted cacao and salt and whisk briskly another minute to combine. Immediately pour sauce over toppings, encouraging the liquid to spread evenly and evening out toppings. Sprinkle the top with a little extra salt. Place in the freezer for at least 30 minutes. Break apart and store in refrigerator. 

Note: You can simply change the ratios of the first three ingredients to make a larger batch for a larger sheet pan if you have space in your freezer.

 
FullSizeRender.jpg
IMAGE.JPG
bark ingredients.jpg

Ingredients: Cacao Powder from Amazon, others from TJ’s

IMAGE.JPG

sprinkle evenly across the pan

IMAGE.JPG

sifted raw cacao powder

IMAGE.JPG

coconut oil

FullSizeRender.jpg

NOT properly mixed — keep whisking if yours looks like this

FullSizeRender.jpg

raw cacao powder added

FullSizeRender.jpg

spread the chocolate mixture and ingredients evenly

IMAGE.JPG
IMAGE.JPG
bark best.jpg
 

ISLAND FISH TACOS

Jennifer Mejia

 
FullSizeRender.jpg
 

I am a huge fish lover! On occasion, I’ve actually considered becoming a pescatarian. Thankfully my kids love it, too! I think some people fear cooking fish because they’ve had a fishy experience. I know that sounds funny, but fresh fish isn’t supposed to smell or taste overly fishy. To prepare, fresh seafood doesn’t need to be fussy, either. Sometimes the simpler the better to let its natural flavor do all of the work. Personally, my favorite way to prepare fish is with citrus, olive oil, and fresh herbs. Perhaps the biggest bonus of serving fish is that it cooks rather quickly, whether it’s on the stovetop, oven, or grill. And did I mention that it’s also really healthy? It’s actually recommended that pregnant women eat two servings of low mercury fish a week. What better endorsement do you need?

A few months ago, an all around awesome woman named Debra Sandler launched a line of sauces and marinades under the brand Bazodee. Debra knows food—from the amazing recipes created by her family in Trinidad to her 35 years of experience in the food industry with companies like PepsiCo, Mars, and Johnson & Johnson, the original makers of SPLENDA Brand Sweetener. Lucky for me, Debra led the company during one of the best times in my career, and she also served a wonderful mentor to me and so many others. This lady knows food and how to make people happy through their bellies. So I couldn’t wait to get my hands on these products and give them a try.

Pronounced BAH-ZO-DEE, the word means “head over heels in love.” With that and Debra at the helm, I knew their line of sauces and marinades had to be good. My first order was for Marvelous Marinade. I’m a big believer in taking short cuts by using prepared ingredients, so long as you recognize everything on the label. And it doesn’t get much simpler and cleaner than this on a label: onions, cilantro, vinegar, olive oil, garlic, scallions, and a few others that didn’t frighten me or that I didn’t have to struggle to pronounce.

When I think islands, I think fish. I decided to try Marvelous Marinade with fish tacos because my week was a little crazy, so I needed something easy to prepare that was still big on flavor. These fish tacos are amazing! And the best part is that they are super simple and will be on your table in a flash. Make things easy on yourself and use a store-bought fresh pico de gallo. Again, it’s really okay as long as it’s made with ingredients you know and without any artificial ingredients. In addition, I topped them off with pickled onions from a blog I love to follow, Lena’s Kitchen. Give this recipe a try. My first attempt was with cod, and they were great. But I later tried them with halibut, a slightly firmer and meatier fish, and I think the win goes to halibut. Either way, you won’t be disappointed. I promise.

 
FullSizeRender.jpg
 

SERVES 4

Don’t get hung up on the measurements of the marinade and toppings. You can’t go wrong. It’s a taco, so if you like one ingredient more than another, pile it on!

            1 tablespoon                  good olive oil              
1 ½  pounds                 firm white fish, such as halibut or cod, uniform in thickness
1 bottle                  Bazodee™ Marvelous Marinade
2                  fresh limes, quartered verticall
1 bunch                  fresh cilantro, leaves only
1                  ripe avocado, halved vertically, seed removed and sliced thinly
  1 cup                  fresh store-bought pico de gallo*        
1 cup                  pickled onions (easy recipe from Lena’s Kitchen)**
  12                  fresh flour tortillas (preferably “handmade”)
  kosher salt
freshly ground black pepper

Pat fish dry with paper towels and season well with salt and pepper. Place fish in a glass dish and coat with Marvelous Marinade. Cover and place in refrigerator for 4 hours, ideally. 

 
IMAGE.JPG
 

Just before cooking the fish, prepare the lime, avocado slices, and cilantro leaves. Heat a large non-stick skillet over medium-high heat and drizzle with olive oil. Add fish, flesh side down, to the pan. Cook for about 3-4 minutes, flip, and cook another 3-4 minutes, depending on thickness of the fish. Set aside. 

 
FullSizeRender.jpg
 

Heat a griddle pan over medium high heat and place tortillas on it for about 2 minutes per side if you like them browned and a little crispy. 

 Place tortilla on a plate and add about 2 ounces of fish to the center. Top with a heaping teaspoon of Marvelous Marinade. Add 3 avocado slices, 2 teaspoons of pico de gallo, about 10 leaves of cilantro, and 6-8 slivers of pickled onions. Squeeze fresh lime juice and sprinkle kosher salt over fish and toppings.

 *I use Trader Joe’s Mild Pico de Gallo Salsa.

**Lena’S Kitchen Pickled Onions at www.lenaskitchenblog.com

 
IMG_8618.JPG
 

GINGER PUMPKIN SANDWICH COOKIES

Jennifer Mejia

 
IMG_8033.JPG
 

My beautiful sister’s baking inspired this creation. Every Christmas season, she makes a few varieties of cookies…and a ton of them! I’m fairly certain everyone counts the days until the holidays in anticipation of devouring her cookies. She might be the best pastry chef I’ve ever met. (She used to win the pie-making contest at work every year. Eventually it became unfair because everyone knew the best tasting and most beautiful pie would be hers.) She makes insanely scrumptious ginger-molasses cookies. Fortunately, or unfortunately, I couldn’t wait until Christmas, so I made my own version of these cookies and pumpkined them up so they’d be in-season a few months sooner. They are beyond delicious and fairly simple to make. This recipe can be halved to make 24 flat cookies, which can be simply iced on top if you don’t want to sandwich them.

A few tips. The cookies are best when baked on a parchment paper lined cookie sheet. I find the bottoms stay softer and don’t get that crunch that cookies can sometimes get when baked directly on the pan. It’s very important not to skip the cooling time for both the cookie dough and filling. The cookie dough needs time to firm up, and the filling needs to thicken. My advice would be to make both in the evening/at night and allow them to chill overnight. Then you can make them first thing in the morning. They’ll hold together better if refrigerated after assembled into sandwich cookies. For me, they’re a cold but not frozen version of the best ice cream sandwich you’ve ever had!

Around this time of year, pumpkin pie filling is well-stocked. Libby’s is the brand I grew up with, but Whole Foods carries a different organic brand that will also work. You could probably even try Trader Joe’s Pumpkin Butter instead of pumpkin pie mix if you can’t find it. Finally, the recipe calls for dark molasses, so use it (not light) because there isn’t any brown sugar in this recipe.

Ingredients for Cookies:

  1½ cups (3 sticks)                  unsalted butter, melted 
½ cup                  dark molasses
2 cups                  granulated sugar
2 large                  eggs
4 cups                  all-purpose flour        
4 teaspoons                 baking soda
2 teaspoons                 ground cinnamon
1 teaspoon                  ground ginger
1 teaspoon                  ground cloves

                                           
Ingredients for Filling:                  

1 pound                 cream cheese, softened, cut into pieces
6 tablespoons                  unsalted butter, softened, cut into pieces
2/3 cup                  pumpkin pie mix
5 cups                 confectioner’s sugar

With an electric mixer fitted with a wire whisk, combine butter, molasses, sugar, and eggs, and mix until creamy.

In a separate bowl, combine flour, baking soda, cinnamon, ginger, and cloves. Add this dry mixture to the wet mixture, initially mixing on a low speed. Mix until blended and smooth. Refrigerate for at least 4 hours. (Fine to refrigerate overnight, as well.)

With an electric mixer fitted with a wire whisk, blend cream cheese, butter, and pumpkin pie mix until smooth. Slowly add confectioner’s sugar, about one cup at a time, mixing continuously until smooth. Cover and refrigerate for at least 4 hours to thicken. (Can also refrigerate overnight.)

Once all have been sufficiently refrigerated, heat oven to 350 degrees. Using your hands, create balls about 1to 1¼ inch in diameter. Then roll the balls in granulated sugar. Place on a cookie sheet lined with parchment paper, at least two inches apart. (I typically make one dozen at a time—4 rows of 3 cookies each.) Bake for 8-9 minutes. Allow to rest on pan for 2 minutes. Cool completely on wire rack.

Once cookies are completely cool, place one flat side up, spread filling, and top with a second cookie, flat side facing the icing. (Alternatively, you can simply ice the round side of one cookie if you prefer less cookie.)

Store in refrigerator. 


IMAGE.JPG

eggs, butter, sugar, molasses

FullSizeRender.jpg

dry ingredients

FullSizeRender.jpg

dry ingredients blended

IMAGE.JPG

adding dry to wet ingredients

IMAGE.JPG

the cookie dough

IMAGE.JPG

filling prior to chilling

FullSizeRender.jpg

cookie dough balls being dipped into sugar

FullSizeRender.jpg
FullSizeRender.jpg

in the oven

FullSizeRender.jpg

baked cookies cooling on the rack

IMG_8037.JPG